Tag Archives: chocolate

Butterscotch Rum Frosting

23 May
Image

Hooray For Booze Infused Cupcakes!

Hello Friends!

It’s been too long since I last posted. I have been busy, busy, busy lately so bear with me while I give you some fun updates! First things first, the truck is so close to completion. We are looking for a company to do the graphics now and hope to be running by the 1st or 2nd week in June – so exciting! I absolutely cannot wait to share photos with you.  I’ve also been busy making some great connections in the Orlando and Daytona area and have the opportunity to participate in some seriously awesome events!

I’ll be giving away lots of cupcake minis at SheCon 2012 this weekend in the Crave Local booth. She Con is an amazing conference for female bloggers (Yay for girl power!!). This year it is being held at Disney! Exciting, right?! So if you’re a female blogger in the Orlando area, you should look into getting your ticket. It’s going to be an awesome event! Click here and you can even get 50% off your ticket price!! 

I’m also going to have my cupcakes at a CraveAmerica event in Orlando on June 14th – more details to come!!

And last but not least, let’s have a little Cupcake Wars update – shall we?? Ok, if you insist! I recently got an email from the producers saying that they really like our brand, our video, and our energy! The email stated that we have made it to the final, final, final round of auditions!! I was told I’ll be contacted within the next week or so to hear the official decision and to start discuss filming schedule! Nothing is guaranteed yet, but I’m so proud of myself for even making it this far. Just goes to show that hard work pays off, and I’m not crazy for trying to pursue my dreams of business ownership and success.

I feel really blessed and overly excited about all the opportunities that are coming my way. I’m ready to kick this business up a notch 🙂

Ok! Thanks for humoring me…the updates are over. On to the recipes!!

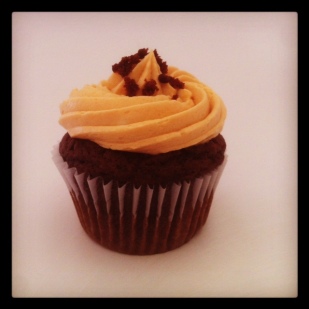
Today I am going to share a delicious recipe for Butterscotch Rum frosting! This the frosting to use if you really want to WOW party guests!

Butterscotch Rum Frosting

Ingredients:

  • 2 sticks of unsalted, room temp, butter
  • 3 cups of powdered sugar
  • ½ cup of flour – just trust me on this!
  • Pinch of salt
  • 2 cups of Butterscotch chips (I get mine in the baking isle at Publix)
  • 4 tbs of dark rum

Directions:

  1. Melt the butterscotch chips in the microwave (or you can use stove top method) Let cool completely before using in frosting
  2. In a stand mixer, cream the butter on medium speed for about 2 minutes. You want it to be smooth
  3. Slowly add in 2 cups powdered sugar and mix on low speed until well combined
  4. Add in the 4 tbs of rum and the remaining cup of powdered sugar. Add them at the same time.
  5. Mix on medium speed for a minute
  6. Add in the cooled butterscotch and mix until well combined
  7. At this point your frosting will be too thin – add in the flour and the salt.
  8. Mix on medium speed for 1 minute
  9. Frost your cupcakes and enjoy!

Extra Tips:

If you want a stronger rum flavor, I suggest brushing the top of the cupcake with rum. If you put more rum into the frosting, it doesn’t hold up too well. Just my experience.

Always remember to add your liquids, especially liquor, in with your powdered sugar. This prevents the butter from curdling.

I like this frosting on a dark chocolate cupcake filled with butterscotch pudding. I hope you enjoy it as much as I do!

Stay Sweet.

Jill

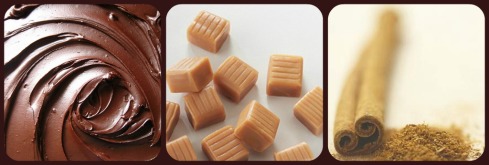
Chocolate Caramel Spice Frosting

29 Mar

Hello Friends!

Can you believe that March is almost over, Spring is here, and Easter is right around the corner! I honestly didn’t even realize just how close Easter was until I actually looked at a calendar. I plan to work on some fun Easter cupcakes this weekend so I’ll be sure to take lots of pictures and share with you some of my tips for creating the perfect Easter cupcake treats. For today though, I want to share a recipe for some sinfully delicious frosting.

Chocolate Caramel Spice frosting is perfect for almost any cake flavor. I suggest making a batch of the frosting first, tasting it (try not to eat it all) and then deciding what flavor cake you think it will best accompany. So far my favorite cakes to use with this frosting have been:

  • Chocolate Coffee Cake
  • French Vanilla Cake
  • Brown Sugar Cinnamon Cake

I’ve worked hard on perfecting the recipe and am so happy to finally be able to share it with you!

Chocolate Caramel Spice Frosting

What You’ll Need:

  1. 2 sticks of unsalted butter (room temperature)
  2. 1/3 cup of cream-cheese (room temperature)
  3. ¼ cup of milk chocolate chips
  4. 15-20 caramel squares
  5. 2 tbs of heavy cream
  6. 2 cups of powdered sugar (sifted)
  7. 2 1/2 tbs of cinnamon

The Process

  • Start by unwrapping all of your caramel squares. Place them in a pan on the stove over medium heat.
  • Stirring the squares constantly, add the heavy cream.
  • Continue cooking until the caramel is melted and you have a nice caramel sauce. Let cool (do not put in the fridge though)
  • In a mixer, cream together your butter and cream-cheese until it is light and fluffy.
  • Add in 1 ½ cups of the powdered sugar and all of the cinnamon – continue mixing for 1-2 minutes until well combined.
  • In a microwavable bowl, melt the chocolate chips (usually 40 seconds does it) Make sure the chocolate is melted smooth and does not have any chunks left in it.
  • Pour the melted chocolate in the mixer and mix for 1 minute.
  • Add in the remaining ½ cup of powdered sugar – mix well.
  • Pour in the cooled caramel sauce – mix for 1 minute or until frosting is smooth.

** If your frosting is too thin – add more powdered sugar. **

There you have it – another great “go-to” frosting recipe! If you have questions about the recipe, let me know. I hope you all enjoy the recipe as much as I do.

Stay Sweet!

xo, Jill

Butterfinger Cupcakes

7 Dec


Happy Wednesday! How’s everyone holding up? With only 18 days until Christmas, I’m sure you’re all as busy as I am.

Believe it or not, I still don’t have my tree up or any decorations in my house! I do have the bulk of my gifts bought though– that counts for something, right? I also have been baking up a storm, but I’m sure that doesn’t surprise any of you 🙂

Today, I actually wanted to take a break from the traditional holiday treats  and feature a cupcake that is one of my absolute favorites! It’s a Butterfinger cupcake, and I guarantee it will fit in just fine at any holiday event or get-together. Enjoy the recipe!! Xoxo

Here’s What you’ll need:

Cupcakes:

  • 1 stick Butter, softened to room temperature
  • 1 1/4 Cup Sugar
  • 2 Eggs
  • 3/4 Cup Flour
  • 1 tbs Baking Powder
  • 1/4 tsp Salt
  • 1 cup of finely crushed Butterfinger (I use a food processor )
  • 1/2 Cup Unsweetened Cocoa Powder
  • 1/2 Cup Milk
  • 1 tbs Vanilla

Frosting:

  • 2 sticks of butter, softened to room temperature
  • 3 cups of powder sugar
  • 1/3 cup of cream cheese
  • 1 tbs of vanilla extract
  • 2 cups of crushed Butterfinger (approx 4 candy bars)

Cupcake Directions:

  1.  Preheat oven to 350 degrees
  2. In your mixer (or with a handheld mixer) beat the butter until it is soft, then add sugar and continue to beat for about 3 minutes.
  3. Add the eggs, one at a time, mixing until they are well combined.
  4. In a separate bowl, combine the dry ingredients(Cocoa Powder, Flour, Salt, Baking Powder)  and whisk them until they are well combined
  5. Add the mixture of dry ingredients to the butter and sugar. Mix well until combined
  6. Mix in crushed Butterfinger
  7. Add the liquids (milk & vanilla), scrape down bowl and beat to combine.
  8. Fill cupcake liners and bake for 20-22 minutes.

While your cupcakes are baking, let’s work on the frosting!

Frosting Directions:

  1. In your mixer beat the butter and cream cheese on med-high speed until light and fluffy.
  2. Add the powdered sugar one cup at a time, mixing well between each cup
  3. Mix in the vanilla, mix for 1 minute
  4. Add in the crushed Butterfinger and mix for another minute.

** If your frosting is too thick, add a small amount of milk or creamer. If your frosting is too thin, add some extra powdered sugar **


Later this week I will be sharing a recipe for Snow-Cap Cupcakes! Have a great week everyone. Stay Sweet!!

Chocolate Chip Cookie Dough

27 Jul

Cookie Dough Cupcakes. Yum!!

It’s Wednesday! That means halfway through the week. You made it this far, I think it’s time for a super indulgent treat! How about some chocolate chip cookie dough cupcakes? These cupcakes are so good, that I have a hard time sharing them. This recipe is fool-proof and will be one you use for many events to come. I promise!

Chocolate Chip Cookie Dough Cupcakes

Chocolate Cake: I always use this chocolate recipe!

Chocolate Chip Cookie Dough Frosting:

Recipe from The Cupcake Review

Ingredients

  • 1/4 cup butter, softened
  • 1/4 cup brown sugar, plus 2 tablespoons
  • 2 teaspoons water
  • 1/2 teaspoon vanilla
  • 1/2 cup flour
  • 1/4 teaspoon salt
  • 1/3 cup mini chocolate chips (optional)
  1. Cream the butter and brown sugar in a small bowl. Add water and vanilla and mix well. Add flour and salt and stir to combine. Stir in mini chocolate chips (optional).
  2. Store in refrigerator until ready to use.
  • 1-3/4 cups confectioners’ sugar
  • 1/2 cup unsalted butter, chilled
  • 1/8 teaspoon salt
  • 1/2 teaspoon vanilla extract
  • 1 tablespoon milk
  1. In the bowl of an electric mixer fitted with the paddle attachment, combine 1-1/4 cups confectioners’ sugar, unsalted butter, salt, and vanilla, scraping down the sides of the bowl with a spatula as necessary.
  2. Add milk and continue mixing until well combined, scraping down the sides of the bowl with a spatula, as necessary. With the mixer running, slowly add remaining 1/2 cup confectioners’ sugar, mix until well combined.
  3. At this point you can mix in the eggless cookie dough mixture that you placed in the fridge. Mix in enough cookie dough to suit your taste. I like a lot 🙂

Frost your chocolate cupcakes with this delicious cookie dough frosting, top with some mini chocolate chips, or even some choco9late jimmies, and enjoy!!

Have a great rest of your week my friends. Stay Sweet!

Xo, Jill

Vintage Giveaway

19 May

Ah, Thursday! One day closer to Friday – Yay!

Today’s final Blog Crawl giveaway is an adorable tank by Sophia Okada Etsy Shop. Her shop specializes in lots of vintage goodies – perfect for any fashionista! Read below to check out how you can enter this giveaway!

I have some more exciting news. All the giveaways will be opened 5 extra days! Giveaways will close at 11:59 pm on Tuesday the 24th. Prize winners will be announced on Wednesday the 25th at 5 pm EST. So if you haven’t entered, here’s your chance. What are you waiting for 🙂

You can enter to win:
Gourmet Chocolate Pops
Handmade Rose Accessories
Carseat Canopy
Free Blog Button and Etsy Banner
Free Cupcakes
Toddler Tutu

Custom Christmas Stocking

Have a great day ~ Stay Sweet!


Hi, I’m Sophia. I’m a student currently residing in Los Angeles and planning to move to New York City this coming fall.I ‘m a big lover of fabrics and fashion and being able to open a small online shop is now my creative virtual outlet.  I designed my Sophiaokada Etsy shop to be filled with the fun things such as handpicked vintage and funky, recrafted and handmade clothing by yours truly. 🙂


Giveaway:

A vintage red 100% silk vintage shirt. A youthful, tank-top style that drapes beautifully. Perfect for summer nights!

Size: Small
Material: 100% Silk
Circa 1980s
Valued price: $32

Make sure to head over to Sophia’s blog to enter the giveaway!

Sweet Tooth Inspiration

26 Apr

So Simple - So True

Every now and then, I like to browse the pages of weheartit.com to find some delcious cupcake inspiration. Please enjoy today’s really sweet photo inspirations!

Sweet Sugary Stars

I just think these blue and yellow star cupcakes are so adorable. They would be perfect for a little boy baby shower! I don’t know why, but I love the combination of light yellow and pastel blue!

Simple and Elegant

Piping frosting in the shape of a rose is a classic! These cupcakes look so delightfully elegant with the pastel decorations on each of them.

Cupcake Garden!

I am officially obsessed with this idea! Baking chocolate cupcakes in little pots and using frosting or fondant to make little sprigs of grass and leaves. It is just too adorable!! I’m making these ASAP!

Breakfast Cupcakes

These cupcakes give me a legitimate excuse to eat cupcakes for breakfast! Come on, you know you still love Fruit Loops, putting them on a cupcake is nothing short of genius!

Cookie Dough Deluxe

This reminds me that I still need to post the recipe for cookie dough frosting….I’m warning you, it’s highly addictive. I’m talking so addictive you might not get to frost your cupcakes because you ate it all. Wait..I didn’t do that 🙂

Well that’s all for today my sweets. Hope you are all having a fabulous Tuesday. Stay Sweet!

xoxo, Jill

Cupcake Fillings

22 Mar

I cannot tell you how many frustrated evenings I have spent trying to fill cupcakes with various creams, jams, and candies. I think every cupcake baker – at one time or another has felt this same irritation. If you cut a hole in each cupcake, it takes forever , if you just jam your filling tip into the cupcake, you don’t have enough room for the filling, and if you use an apple corer you end up taking too much cake out….oh the perils of  filling a cupcake – haha.

Cupcake Corer!

Not to worry, my dear cupcake lovers – I have found a solution!! Williams-Sonoma sells a “Cupcake- Corer” – perfect for all your cupcake filling needs. The best part about this product is that it only costs $5.00 – what a deal!! You simply push the corer into your cupcake and pull up. There you have it, a perfectly hollowed cupcake! The corer does all the work for you! I have read the reviews and they all seem positive. I wish I could give you my own review, but sadly enough I do not have this wonderful cupcake corer yet. I tried to order it online but it was “temporarily out of stock”. It is available in their store though – which is where I’ll be purchasing mine soon!

So what type of fillings are you going make now that cupcake filling is made simple?? I love a double berry filling but I also really enjoy a creamy Peanut Butter filling inside of a moist chocolate cupcake.

Peanut Butter Filled Chocolate Cupcakes

Peanut-Butter Filling

  • 2 sticks of unsalted butter
  • 4 cups of powdered sugar
  • 1 tsp of vanilla flavoring
  • 2 cups of Peanut Butter
  • 2 tsp of milk

In your mixer, on medium high,  cream together the butter and the peanut butter. This usually take 2-5 minutes to achieve the proper consistency

Add your powdered sugar one cup at a time, mixing in between each cup

Continue mixing on medium high for 1 minute

Add your vanilla and your milk – mix for another minute. You’re frosting should be thick and creamy. If it is not the consistency you want, continue mixing for another 2 minutes.

Fill your chocolate cupcakes with this creamy deliciousness and enjoy!! Top with chocolate or peanut butter frosting – nothing is better!

Stay Sweet,

Jill xoxo

Gourmet Marshmallows

25 Feb

Sweetly Softly Marshmallows!

Thank God it is Friday!!! I need the weekend like you wouldn’t believe.

Today I want to introduce you to one of my new Sponsors, Softly Sweetly: Gourmet Marshmallows. I was so excited that Rachael from Sweetly Softly wanted to sponsor my blog that I headed right over to her adorable Etsy shop and purchased some marshmallows to try. I chose the Peanut Butter Swirl marshmallows. Here’s what I thought:

So excited to see these in my mailbox!!

  • Unbelievably fast delivery


  • Adorable packaging – My 6 marshmallows were packages neatly together with a ribbon tied around them. Perfect for gift giving, except I didn’t plan on giving them away 🙂


  • Huge portions! I got 6 Marshmallows and each square was at least an inch thick and an in wide. It was massive – perfect size for a quick little sweet treat!


  • Delicious! I had never tried homemade flavored marshmallows before. Let me tell you – it was a bite of heaven on earth! So fluffy, and the swirls of peanut butter made it so much more than a regular marshmallow. These are not Jet-Puffs, I’ll tell you that.

My boyfriend had one, or two, and absolutely loved them too. I have a couple left in my fridge because I plan on dicing them up and using them as toppers on my chocolate peanut butter cupcakes. Don’t you think that will be so cute and yummy!!

Who wouldn't love caramel filled w/ Marshmallow?

I am so happy to announce that Softly Sweetly is offering you guys an awesome coupon code! Use code CUPPYCAKE10 for 10% off her already incredible prices!

Here’s just a few of her incredibly delicious sounding treats:

Toasted Coconut

Triple Chocolate

Bacon Chipotle

Rocky Road

Orange

Caramel Covered!!

Stop over at Softly Sweetly and get your sweet fix for the weekend. Stay Sweet!

xoxo,

Jill

Left-Over Cupcake Batter

15 Feb

Freeze! Don't throw it away!

I can’t tell you how many times I have made a full bowl of batter just to make 6 little cupcakes! I finally decided that I would try freezing my left-over batter in a glass pyrex container. I didn’t know if it would work or not, but it was better than wasting all the left-overs. The next time I needed to make cupcakes, I took the batter out, let it thaw ahead of time, and made my cupcakes as usual. I anxiously tasted the cupcakes after they had cooled, and to my wonderful surprise, they were fabulous, and still so fresh!! An added perk? When baked,  the thawed batter formed the most beautiful cupcake peaks!

I have saved myself so much time and money with this simple trick. So here are a few pointers for saving your batter:

  1. I have tried saving in both plastic and glass Tupperware. I wasn’t happy with the way the plastic Tupperware preserved my batter. I now use soley glass Tupperware with a very secure lid.
  2. Frozen batter only lasts for 7-10 days in the freezer. Any longer and it doesn’t rise or taste good at all. The sooner you can use it, the better.
  3. Make sure all of the air is released from the Tupperware. The more air you have, the more ice crystals will form. No one like frostbitten cupcake batter!
  4. Don’t use the microwave to thaw your batter. Give your batter a few hours to thaw before you are going to bake.
  5. Make sure you label your batter with the flavor and the date – that way you don’t forget what it is, or when you first made it.

I hope this trick saves you as much time and money as it has saved me! Have a sweet day!

Xoxo, Jill

Fresh Berry Frosting

20 Jan

25 days til Valentine's Day !

Can you believe it is already the end of January?!? I do not enjoy how fast time is flying. Seems the older I get, the more I find myself questioning where the heck the time went!! It doesn’t help that many stores had Valentine’s decorations and candy on sale before Christmas was even over. I LOVE Valentine’s day – but they started pushing it a little early this year!

Speaking of , there are officially 25 days left until Valentine’s Day. Which means we all still have a decent amount of time to think about what we are going to get that special someone on the day that celebrates love! It also means that for the next 25 days, I have an awesome excuse to bake, decorate, and eat tons of girly pink cupcakes!

Today I want to share some Valentine Inspiration with you. Hopefully this will help you start thinking about the many SWEET ways we can celebrate Valeninte’s Day – starting with fresh Strawberry Frosting!

**The frosting in the pictures is my Strawberry Buttercream. Unfortunately, I do not have a picture of my Fresh Strawberry Frosting. **

Fresh Strawberry Frosting

This yummy strawberry frosting is perfect for any chocolate, vanilla, or lemon cupcake. It is fresh, elegant, and taste amazing! The pink color and the fresh strawberries make it the perfect Valentine’s treat. This frosting is different from my Strawberry Buttercream, but just as easy and just as yummy! 

 Ingredients

1.    4 cups of fresh strawberries (frozen will work just as well, make sure you thaw them though)

2.    1 stick of room temperature butter

3.    8 oz of low-fat cream cheese

4.    ½ tsp of vanilla extract

5.    4 cups of powdered sugar

6.     1 cup of white sugar

7.     2 tbs of water Pink food coloring (optional)

Directions

• In a mixer on medium high speed with your paddle attachment, cream together the butter and cream cheese

• Slowly add in the powdered sugar one cup at a time, making sure it is fully combined before adding the next one.

• Add the vanilla and mix on high for 3-5 minutes

• Dice up the strawberries in small cubes, put in a medium sauce pan

• Add 1 cup of white sugar and 2 tbs of water to the strawberries

• With a potato masher, mash the strawberries together with the sugar

• Heat on medium heat until mixture comes to a boil.

• Let cool in the fridge until mixture thickens

• Add the cooled strawberry compote to the mixer and combine with the frosting (make sure your strawberries are completely cooled or you will ruin your frosting) Mix for 2 minutes.

• Add pink food coloring for a pinker frosting (optional)

XOXO

There you have it, yummy strawberry frosting! I like this frosting best on top of a chocolate cupcake- it’s a fun take on chocolate covered strawberries 🙂 After all, who doesn’t love strawberries and chocolate!

Enjoy the recipe and keep an eye out for a Valentine’s Giveaway – coming soon!!!

Xoxo Jill

*All photos are property of Stay Calm, Have a Cupcake. Photos by ABYoung Photography**