Tag Archives: stay calm cupcake

Butterscotch Rum Frosting

23 May
Image

Hooray For Booze Infused Cupcakes!

Hello Friends!

It’s been too long since I last posted. I have been busy, busy, busy lately so bear with me while I give you some fun updates! First things first, the truck is so close to completion. We are looking for a company to do the graphics now and hope to be running by the 1st or 2nd week in June – so exciting! I absolutely cannot wait to share photos with you.  I’ve also been busy making some great connections in the Orlando and Daytona area and have the opportunity to participate in some seriously awesome events!

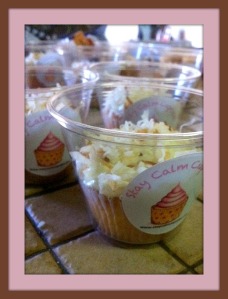
I’ll be giving away lots of cupcake minis at SheCon 2012 this weekend in the Crave Local booth. She Con is an amazing conference for female bloggers (Yay for girl power!!). This year it is being held at Disney! Exciting, right?! So if you’re a female blogger in the Orlando area, you should look into getting your ticket. It’s going to be an awesome event! Click here and you can even get 50% off your ticket price!! 

I’m also going to have my cupcakes at a CraveAmerica event in Orlando on June 14th – more details to come!!

And last but not least, let’s have a little Cupcake Wars update – shall we?? Ok, if you insist! I recently got an email from the producers saying that they really like our brand, our video, and our energy! The email stated that we have made it to the final, final, final round of auditions!! I was told I’ll be contacted within the next week or so to hear the official decision and to start discuss filming schedule! Nothing is guaranteed yet, but I’m so proud of myself for even making it this far. Just goes to show that hard work pays off, and I’m not crazy for trying to pursue my dreams of business ownership and success.

I feel really blessed and overly excited about all the opportunities that are coming my way. I’m ready to kick this business up a notch 🙂

Ok! Thanks for humoring me…the updates are over. On to the recipes!!

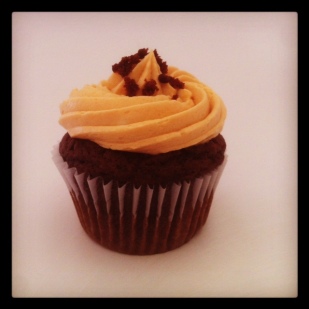
Today I am going to share a delicious recipe for Butterscotch Rum frosting! This the frosting to use if you really want to WOW party guests!

Butterscotch Rum Frosting

Ingredients:

  • 2 sticks of unsalted, room temp, butter
  • 3 cups of powdered sugar
  • ½ cup of flour – just trust me on this!
  • Pinch of salt
  • 2 cups of Butterscotch chips (I get mine in the baking isle at Publix)
  • 4 tbs of dark rum

Directions:

  1. Melt the butterscotch chips in the microwave (or you can use stove top method) Let cool completely before using in frosting
  2. In a stand mixer, cream the butter on medium speed for about 2 minutes. You want it to be smooth
  3. Slowly add in 2 cups powdered sugar and mix on low speed until well combined
  4. Add in the 4 tbs of rum and the remaining cup of powdered sugar. Add them at the same time.
  5. Mix on medium speed for a minute
  6. Add in the cooled butterscotch and mix until well combined
  7. At this point your frosting will be too thin – add in the flour and the salt.
  8. Mix on medium speed for 1 minute
  9. Frost your cupcakes and enjoy!

Extra Tips:

If you want a stronger rum flavor, I suggest brushing the top of the cupcake with rum. If you put more rum into the frosting, it doesn’t hold up too well. Just my experience.

Always remember to add your liquids, especially liquor, in with your powdered sugar. This prevents the butter from curdling.

I like this frosting on a dark chocolate cupcake filled with butterscotch pudding. I hope you enjoy it as much as I do!

Stay Sweet.

Jill

Bake Sale Success!

1 May

This past weekend, I participated in the Food Blogger Bake Sale, supporting Share our Strenth, an organization fighting childhood hunger. It was such an inspiring event to be a part of! Not only did I meet some of Orlando’s finest food bloggers, I was able to take part in raising over $1,400 for a charity that is helping feed so many hungry children.

For the bake sale, I made Strawberry Lemonade Cupcakes, Cookies and Cream Cupcakes, and Toasted Coconut Cupcakes! I was thrilled that my cupcakes were a hit with the customers!
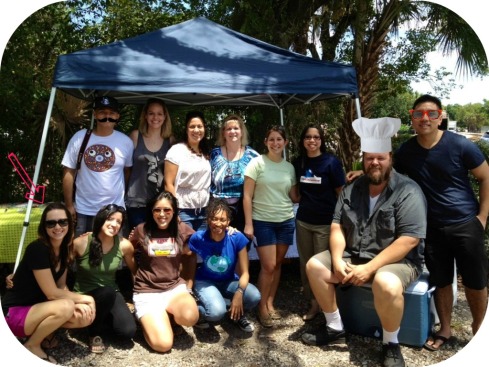
Here’s some photos from the event! Enjoy

(I hope Ricky, Chris, and Julius don't mind my fun little additions to the picture!)

The photo above shows the whole group of bloggers who participated in the bake sale. Please go check out their blogs – they all have incredible photography, recipe, and restaurant reviews.

Back row: Julius from Droolius, Angie from Eclectic Recipes, Wanda from My Sweet Zepol, Robin from Simply Southern Baking, Katie from Katie’s Cucina, Julie from The Little Kitchen, Chris from Eat Local Orlando, Ricky from Tasty Chomps.

Front row: ME!! , Marilyn from Forkful, Pearleen from Mega Yummo and Jacqueline from BeyondNFinity.

At the bakesale, getting ready for customers!


 Hope everyone is having a fabulous week. Stay tuned for more recipes and some updates from my advetures in Cupcake Wars casting for Season 7!

Stay Sweet!

xo, Jill

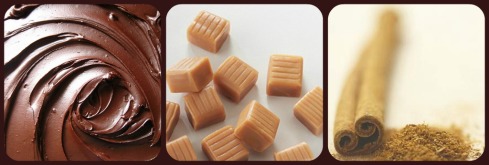
Chocolate Caramel Spice Frosting

29 Mar

Hello Friends!

Can you believe that March is almost over, Spring is here, and Easter is right around the corner! I honestly didn’t even realize just how close Easter was until I actually looked at a calendar. I plan to work on some fun Easter cupcakes this weekend so I’ll be sure to take lots of pictures and share with you some of my tips for creating the perfect Easter cupcake treats. For today though, I want to share a recipe for some sinfully delicious frosting.

Chocolate Caramel Spice frosting is perfect for almost any cake flavor. I suggest making a batch of the frosting first, tasting it (try not to eat it all) and then deciding what flavor cake you think it will best accompany. So far my favorite cakes to use with this frosting have been:

  • Chocolate Coffee Cake
  • French Vanilla Cake
  • Brown Sugar Cinnamon Cake

I’ve worked hard on perfecting the recipe and am so happy to finally be able to share it with you!

Chocolate Caramel Spice Frosting

What You’ll Need:

  1. 2 sticks of unsalted butter (room temperature)
  2. 1/3 cup of cream-cheese (room temperature)
  3. ¼ cup of milk chocolate chips
  4. 15-20 caramel squares
  5. 2 tbs of heavy cream
  6. 2 cups of powdered sugar (sifted)
  7. 2 1/2 tbs of cinnamon

The Process

  • Start by unwrapping all of your caramel squares. Place them in a pan on the stove over medium heat.
  • Stirring the squares constantly, add the heavy cream.
  • Continue cooking until the caramel is melted and you have a nice caramel sauce. Let cool (do not put in the fridge though)
  • In a mixer, cream together your butter and cream-cheese until it is light and fluffy.
  • Add in 1 ½ cups of the powdered sugar and all of the cinnamon – continue mixing for 1-2 minutes until well combined.
  • In a microwavable bowl, melt the chocolate chips (usually 40 seconds does it) Make sure the chocolate is melted smooth and does not have any chunks left in it.
  • Pour the melted chocolate in the mixer and mix for 1 minute.
  • Add in the remaining ½ cup of powdered sugar – mix well.
  • Pour in the cooled caramel sauce – mix for 1 minute or until frosting is smooth.

** If your frosting is too thin – add more powdered sugar. **

There you have it – another great “go-to” frosting recipe! If you have questions about the recipe, let me know. I hope you all enjoy the recipe as much as I do.

Stay Sweet!

xo, Jill

Mint Chocolate Chip Cupcakes

14 Mar

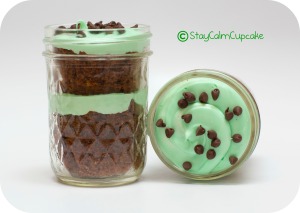
St. Patrick’s Day is right around the corner, and what better way to celebrate than with some mint chocolate chip cupcakes! This recipe is a classic and the minty green frosting makes its perfectly festive for an Irish holiday.

Mint Chocolate Cupcakes

~*~ Makes 15 Cupcakes ~*~

Ingredients for Chocolate Cake:

  • 1 stick Butter, softened to room temperature
  • 1 1/4 Cup Sugar
  • 2 Eggs
  • 3/4 Cup Flour
  • 1 tbs Baking Powder
  • 1/4 tsp Salt
  • 1/2 Cup Unsweetened Cocoa Powder
  • 1/2 Cup Milk
  • 1 tbs Vanilla

Directions:

  1.  Preheat oven to 350 degrees
  2. Beat the butter with an electric mixer until it is soft, then add sugar. Beat about 3 minutes.
  3. Add the eggs, one at a time beating until they are well combined.
  4. In a separate bowl, combine the dry ingredients and whisk them until they are well combined
  5. Add 1/3 of the dry ingredients to the butter and sugar and beat it just to combine.
  6. Add the liquids (milk & vanilla), scrape down bowl and beat to combine.
  7. Continue adding the dry ingredients. Beat for another minute till smooth
  8. Fill cupcake liners and bake for 20-22 minutes.

Mint Buttercream

Ingredients

  • 2 sticks of room temperature butter (it’s very important they are room temp)
  • 3 cups of powdered sugar (no need to sift)
  • 1 tbs of cream of tartar
  • 6 tbs of Half and Half
  • 1/2 cup of thawed cool whip
  • 1/4 tsp mint extract (use a little more depending on how “minty” you want it)
  • 2 drops of green food coloring

Directions:

  1. Beat the butter in your mixer until very creamy. You will need to scrape the bowl several times
  2. Adding one cup of powdered sugar at a time, mix in with the butter.
  3. Add the half and half and mint extract. Beat on medium speed for 5 minutes (be patient!)
  4. Add the cream of tartar, food color and cool whip.
  5. Mix on medium high for another 3-4 minutes.

I like to decorate my cupcakes with mini semi-sweet chocolate chips. It’s also a nice touch to bake them in some festive cupcake liners.

There you have it, an easy and delicious way to celebrate the luck of the Irish!

Stay Sweet!

xoxo, Jill

McCormick St. Patrick’s Day Giveaway (closed)

9 Mar

Can you believe we are already gearing up for St. Patrick’s day?! I can’t. But I can say I am so excited to announce a new giveaway. A McCormick Giveaway!

Last October, McCormick was kind enough to send me and 2 of my readers a fun Halloween kit, full of baking supplies. It was such a fun giveaway and the box was filled with so many great baking items. I just couldn’t resist another opportunity to partner with McCormick again!

 McCormick has agreed to give 3 of my lucky readers a fun gift set just in time for the holiday of luck!! This box if filled with lots of ingredients for the perfect St. Patrick’s Day treat!

The McCormick gift set includes:

  1. Vanilla flavoring
  2. Green food coloring
  3. Peppermint Extract
  4. Two packages of St. Patrick’s Day cupcake liners
  5. Over 10 St. Patrick’s Day baking recipes

The giveaway is simple. Once you complete the following items, you will be entered to win. A winner will be announced on Monday the 12th and your prize will ship that afternoon! Ready for the rules?

McCormick St. Patrick’s  Baking Kit Giveaway Rules:

You must leave a comment on this blog post for every entry you submit

Mandatory:

Go the McCormick Facebook Page and tell them Stay Calm Cupcake sent you!

Extra Entries:

Follow my facebook page and leave a comment

Subscribe to my blog (on the top right hand side of the blog)

Follow me on Twitter and retweet about the contest. Use the tweet “@StayCalmCupcake is giving away a McCormick Halloween Kit!

Next week I will be featuring lots of yummy St. Patrick’s Day treats. So make sure  you stop back by and get some inspirtaion for making yummy green treats of your own!

Have a great weekend. Stay Sweet!

xo, Jill

Key Lime Pie Cupcakes

21 Feb

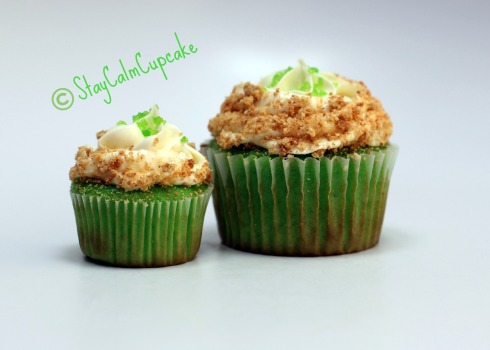
So here it is friends, the long awaited and much requested Key Lime Pie Cupcake recipe! Just in time for all of the  green festivities that St. Patrick’s Day brings us next month.

This tart and tangy, sweet and sassy cupcake certainly packs a punch. It is a guaranteed hit with anyone who loves Key Lime Pie as much as I do….which admittedly, is too much! 🙂

Enjoy!

Key Lime Cupcake

Makes 24 Cupcakes

Cupcake Ingredients:

  • 6 cups cake flour sifted
  • 2 tablespoons baking powder
  • 1 1/2 cups butter or margarine, softened
  • 3 cups granulated sugar
  • 2 cups milk
  • 2 tsp Vanilla Extract
  • 8 egg whites
  • 1 Lime
  • 3 tbs of Lime Jello Mix (dry)

Directions:

  1. Preheat oven to 325°F. Fill Cupcake pan with liners
  2. Sift together flour and baking powder. Set aside.
  3. Cream butter and sugar together until light and fluffy. Set aside.
  4. Beat egg whites with hand mixer until stiff, but not dry. Set aside.
  5. With your stand mixer at slow speed, add flour mixture to butter mixture, alternately with milk. Beat well after each addition.
  6. Add in 3 tbs of dry Lime Jello mix – mix well to incorporate
  7. Beat in 1/3 cup of lime juice
  8. Beat in vanilla extract.
  9. Gently fold egg whites into batter.
  10. Pour batter into prepared pans.
  11. Bake for 18-22 minutes or until tops are lightly browned and toothpick comes out clean.


Whip Cream Frosting

  • 1 (8 ounce) package of cream cheese, softened
  • 1/2 cup white sugar
  • 2 teaspoons vanilla extract
  • 2 cups heavy cream

Combine the cream cheese, sugar, and vanilla extract in the bowl of your stand mixer. Use the whisk attachment and mix on medium speed until smooth.

While the mixture is still whipping, slowly pour in the heavy cream.

Stop and scrape the bottom of the bowl a couple of times while you continue.

Continue mixing until the frosting can hold a firm peak. Do not over beat though.

Decorations:

  • The zest of one lime
  • 15 graham crackers, crushed
  • Lime green sanding sugar

Once your cupcakes have cooled and your frosting is ready – pipe frosting onto each cupcake. Place the graham cracker crumbles on a plate and roll the edge of the cupcake in the crumbs. Sprinkle each cupcake with lime zest. Finish with a few lime green sugar sprinkles.

There you  have it! Fun, festive, and delicious!!  Until next time, Stay Sweet!

Xo, Jill

Candy Corn Cupcakes

11 Oct

What makes a pumpkin smile? Candy Corn of course!!

As promised, today is all about candy corn cupcakes!! If you haven’t already, make sure you enter to win an awesome McCormick Halloween Treat Basket. Find out more details on the prize and how to enter here.

Candy Corns have been, and always will be, the quintessential fall candy. I’m not sure what I like best about them….the bright fall colors, the taste of pure sugar, or the fact that they are perfect for decorating cupcakes with!

Today’s Recipe and Decorating ideas are super easy and perfect to do with your little ones at home. I love this recipe because you bake candy corn right into the cupcake! They come out gooey and delicious – not to mention they look so festive!

Candy Corn Cupcake

For this cupcake, I use a traditional vanilla cake recipe. If you want to make this even easier, you can use a box mix.

Here’s what you’ll need:

  • Vanilla Cake Batter (or Box mix)
  • Vanilla Frosting (or Can Frosting)
  • 2 ½ cups of candy corn
  • McCormick Yellow Food Coloring
  • McCormick Red Food Coloring
  • Fall colored sprinkles
  • Cupcake Liners
  • Piping Bag
  • Start Tip for frosting

Ok, now that we have all of our necessary ingredients, let’s get started.

  1. Start by chopping up 1 cup of candy corn. I did this with a knife, but a food processor would work well too. You want medium size chunks.
  2. Pour the chopped candy corn into the vanilla cake batter
  3. Measure out 3 tbs of fall sprinkles. Pour sprinkles into the cake batter.
  4. Mix the candy corn and sprinkles thoroughly into the cake batter
  5. Pour cupcake batter into your cupcake liners and bake for 15-18 minutes or until the tops of your cupcakes are slightly brown.
  6. Let cool for 20-30 minutes.

Chooped Candy Corn

Candy Corns Baked Right In the Batter!

Let’s makes some frosting while we are waiting for our cupcakes to cool.

  1. Take the vanilla frosting, whether it is canned or homemade, and divide it into 3 bowls.
  2. In one bowl, use 3 drops of McCormick’s yellow food coloring and mix well – set aside
  3. In one bowl use 3 drops of McCormick’s yellow food coloring and one drop of McCormick’s red food coloring. Combine well until you get the perfect color orange.
  4. Using a spatula or spoon, spoon some yellow frosting into the left side of your piping bag. Fill the other side with orange frosting, and top with the remaining white frosting.
  5. Swirl the frosting onto your cupcake and decorate with candy corn!

Be creative with your candy corn decorations – possibilities are endless!

Hope you and family enjoy this fun fall recipe. Let me know how your candy corn cupcakes turn out!

Stay Sweet. Xoxo

Red Velvet Cupcakes

7 Oct


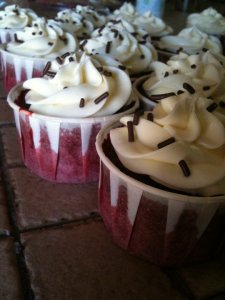
Happy Friday! It feels so good to know that in a few hours, my weekend will be here! I recently made red velvet cupcakes for a friends birthday and rembered just how much I love this recipe. Its such a great recipe that I am recycling this post from when I originally posted in over a year ago. Enjoy!

~~~~~~~~~~~~~~~~~~~~~~~~~~~~~~~~~~~~~~~~~~~~~~~~~~~~~~~~~~~~

Red Velvet cake and I used to have a bittersweet relationship…I could never get the recipe “just right”. That was until I found a recipe that I actually like, and am capable of creating. I adapted this recipe from Bobbly Flay’s show “Throwdown with Bobby Flay”. Enjoy the recipe, and enjoy all the praises you’ll get when you pass these little guys out.

Red Velvet Cupcakes

adapted from “Throwdown with Bobby Flay”

Makes 16 Large cupcakes – 24 regular size cupcakes

Ingredients

For the cupcakes:

  • 2 cups all-purpose flour
  • 1 1/4 teaspoons baking soda
  • 1 1/4 teaspoons salt
  • 4 tbs unsweetened cocoa powder
  • 1 1/2 cups vegetable oil
  • 1 ½  granulated sugar
  • 1 1/4 cups buttermilk
  • 3  large eggs
  • 2 tsp of red food coloring
  • 1/8 cup of water
  • 2 tsp of vanilla
  • 1 ¼ tsp of vinegar (white or apple cider)

Directions

Preheat oven 350 degrees F.

Sift together flour, baking soda, salt, and cocoa powder into a bowl and set aside. (**Sifting is very important here – I usually skip sifting, but I don’t skip it in this recipe because without sifting, your cupcakes won’t be fluffy and moist.)

In a mixer fitted with the paddle attachment, mix oil, sugar, and buttermilk until combined. Add eggs, food coloring, vinegar, vanilla and water and mix well. Add the dry ingredients a little bit at a time and mix on low, scraping down sides occasionally, and mix until just combined. Be sure not to over mix, or the batter will come out tough.

Line your cupcake pan with paper liners, scoop the batter into the liners and bake at 350 degrees F for 20 to 30 minutes or until the toothpick comes out clean. Let cool

 Cream Cheese Frosting

  • 2 packages of 8 oz. Cream Cheese
  • 3 cups of powdered sugar
  • 1 tbs of vanilla extract
  • 1 tbs heavy whipping cream
  • 2 Sticks of unsalted Butter

Cream together cream cheese and butter – Mix on high speed up soft and well combined

Add the powder sugar one cup at a time – mixing thoroughly after each cup

Add in the vanilla and mix well

Beat on medium high speed until desired consistency is achieved.

ENJOY!!

It’s Been A Year!

15 Sep

Today is a very special day for me and I’m excited to share it with you all. One year ago today I opened up Stay Calm Cupcake Shop. It’s cliché to say, but I honestly can’t believe how fast the time has gone by.
In the past year I have learned so much about myself, my passion for cupcakes, the importance of a great customer, and the best way to be successful in an industry that’s always changing. I want to share a few key things that helped me succeed over the past year. I think these are important things to remember when running your own shop.

Stay Calm Cupcake

1. Do what makes you happy, even if you think it’s impossible! I thought that running a successful online shop and having a full time day job would be impossible. It’s not impossible; it just takes a bit of hard work and alot of dedication.

2. Promote your shop like it’s your job – because it is! I never let a day go by when I don’t post, comment, or interact on social media sites. Make Twitter, Facebook, Pinterest, Instagram your best friends! They are free tools to help you network and promote your shop.

3. Give people more than they expect. I can’t tell you the many times I’ve given people free cupcakes, surprise samples in the mail, or extra goodies in an order. A little thoughtfulness goes such a long way with your customer.

4. Blog! I love blogging, and don’t post as often as I should. But I can tell you that my inspiration comes from all of the amazing bloggers I interact with on a daily basis. Blogs are great for getting inspiration, support, and even publicity. I would not have been so successful this year had it not been for blogs like: The Cupcake Blog, Sock It To Me, Mrs. Stephanie T, Delightful Designs, It’s Simple Love, and so so so many others who supported and promoted my shop!

5. Trust your customer. Feedback is key. Listen to what your customers are telling you and react accordingly. Without a solid customer base, I would have nothing. It’s important to keep that in mind!

6. Lastly – Make friends with other shops. Don’t be afraid of competition. Sometimes a little healthy competition is good 🙂 I have met so many incredible etsy shop owners that have more than inspired me to improve my shop.

So, what’s next for Stay Calm Cupcake?

Right now I am developing some very yummy fall flavors including Halloween, Thanksgiving, and Christmas treats. I am working with a designer to launch my own website, and am continuing to look for a cupcake truck to purchase. I’m happy to report that my dream of owning and operating the StayCalmCupcake Truck is closer now than ever. I can’t share too much right now, but I’ll keep you posted 🙂 I also continue to cater parties and deliver to locals in the Volusia County, Florida area. Things are moving along nicely! I couldn’t feel more blessed.

Again, thank you for all the support and cupcake purchases over the past year! I cherish all of you and look forward to many more years of successful cupcake baking!

Use code “SweetYear” for a 25% off discount on any single item in my shop. Offer good Until October 1, 2011

Stay Sweet Friends! xoxo

Candy Apple Cupcakes

29 Aug

Happy Monday!

I hope everyone had a great weekend filled with yummy sweets and lots of relaxing. My weekend was packed with lots of baking, birthday parties, and puppy love. If you follow me on Facebook or Twitter, you will know that I recently got a new pup. His name is Hugo and he is such a love. I’m a new dog mom, so if any of you have advice, don’t be shy. Fill me in!

Let’s get to the sweet stuff though. I’ve been busy in the kitchen getting ready to launch all of my fall flavors on my Etsy shop. In doing so, I have come up with some awesome recipes that are sure to be huge hits at your office parties, family dinners, holiday get-togethers, and more.

I really love the flavor combination that a candy apple provides. With the start of school, it seemed like the perfect time to make candy apple cupcakes. A little sweet, a little tart, a lot of yummy! Almost a year ago, a friend of mine sent me a recipe for Caramel Apple Cupcakes. This recipes is very similar, but with a twist in the frosting.

Enjoy the recipe. Xoxo

Candy Apple Cupcakes

Ingredients:

2 1/4 cups all purpose flour
1 1/4 cups sugar
1/2 teaspoon baking powder
1/2 teaspoon baking soda
1/2 teaspoon salt
1 1/2 teaspoon cinnamon
1/2 teaspoon nutmeg
2 large eggs

1 Tbs of lemon juice
1/2 cup melted butter
1 cup applesauce
1 cup shredded or finely chopped, Granny Smith apples

Directions:

1.       Preheat your oven to 350 degrees. Prep a cupcake pan with liners.

2.       In a large bowl whisk together the flour, sugar, baking powder, baking soda, salt, cinnamon and nutmeg.

3.       In a mixer, stir the eggs, butter, and applesauce and lemon juice. Mix until combined. Carefully add the dry ingredients.

4.       Peel and slice the apple. Then using a grater, grate the apple into fine shreds, like cheese. You can also chop it finely which works just as well. Now stir the shredded apples into the batter mixture.

5.       Bake for 15-20 mins, I find that 18 minutes works best. You don’t want the inside of the cupcake to be mushy.

Photo from Just Jenn Recipes

Candy Flavored Frosting

I used a vanilla frosting base and drizzle red candy syrup over the top. I have seen people forgo the frosting and just dip the cupcake into the candy syrup (photo below). Either way will work and either way will be delicious!

For the frosting:

2 sticks of butter (unsalted)
1/2 cup butter (salted)
1 cup packed brown sugar
1/4 cup whole milk
3 cups powdered sugar, sifted
1 teaspoon vanilla extract
1tsp cinnamon
1Tbs of Apple Juice
½ Tbs of lemon juice

1.      In a mixer, beat 2 sticks of butter until light and fluffy. Add in 1 cup of powdered sugar and mix for 1 minute. Let sit

2.      In a saucepan on medium heat, melt the butter and brown sugar. When they are melted and bubbly, add the milk. Carefully raise the heat and bring the mixture to a quick boil. Careful – you don’t want to burn it. Once it foams up and turns that lovely caramel color, take it off the heat immediately.

3.      Remove pan from heat and stir in the remaining 2 cups of powdered sugar and vanilla, cinnamon and both apple and lemon juice, mixing until frosting is smooth.

4.      Let cool completely

5.      Once cool, slowly pour into your mixer and combine with the butter and sugar you previously prepared. Mix until light and fluffy. If your frosting is to thin, add more powdered sugar.

Mini Cupcakes dipped in Candy Apple Topping. Photo by HonestFare.com

Candy Drizzle

  • 2 cups sugar
  • 3/4 cup water
  • 1/2 cup light corn syrup
  • 2 teaspoons red food coloring
  1. Bring water, sugar, corn syrup to a boil in a small pot, add food coloring and reduce heat to a simmer. Watch the pot carefully cook it this way for about 20 minutes. After 12 minutes, check the temp using a candy thermometer .You need the candy to reach 310°F                                            (If you don’t have a candy thermometer, use the water test. Drip a few drops of the hot candy into a small bowl of room temp water. When the candy holds its form or makes ribbons, it is done.)
  2.  When candy is done, drizzle it over each cupcake. It will harden and make a very delicious topping for y our Candy Apple Cupcakes.

Stay Sweet and have a great week! xoxo